DIY Razor
Well I am building a DIY version of the Razor. I have a few of my own ideas of how I want to run the harness, how I am going to attach the tanks etc. Not that there is anything wrong with the actual Razor, I just like to play around. For the record I am not trying to save money. I could have just bought a Razor and went and dove it. However, I do not like the way the harness is routed on the front straps. I prefer the front straps to go straight down my body and connect to a waist belt. This is how my current sidemount rig (Nomad JT) is configured after Dave and I reworked it. I am going to document the process of building a DIY Razor on this site so keep checking back...
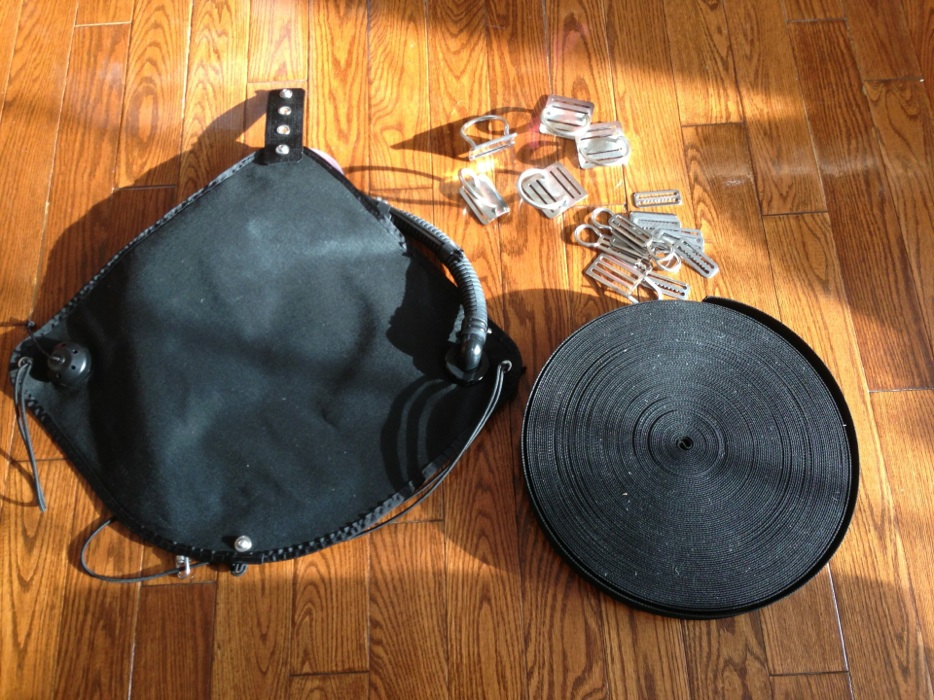
Well so far to date I have accumulated the following:
Actual Batwing from www.GoSidemount.com $400.00
Various High Seas Millwork welded stainless D-rings (Leisurepro) $125.00
These D rings btw are super nice, especially the offset D. I use these currently on my JT.
2” Black webbing (Leisurepro). Got this on sale for about $1.00/ft $100.00
Chunk of 1/8” 6061 Aluminum plate (marine grade) $0.00
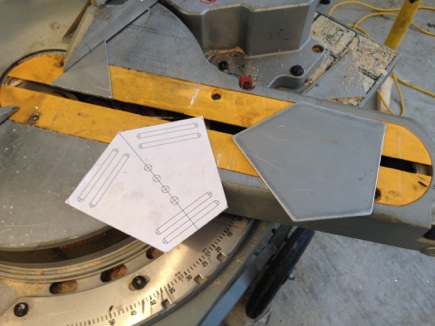
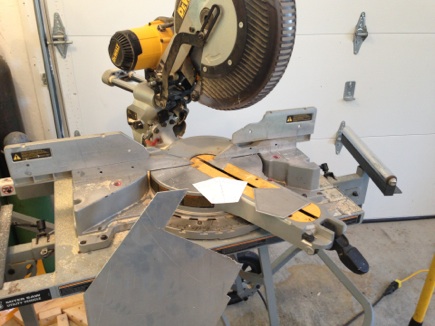
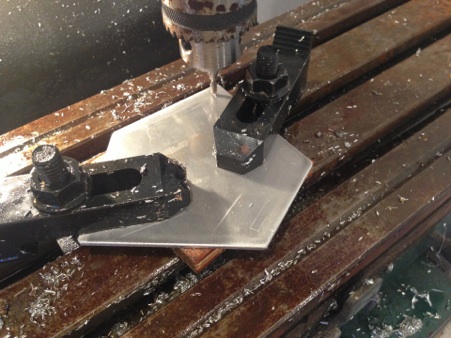
Step 1) - Design my own brackets to connect webbing at back. I cut the first plate for the back upper connection today using my mitre saw. Mitre saws cut this thickness of aluminum plate remarkably well and allow me to get accurate angles. See pics below of rough cut aluminum plate. I laid out the design I came up with in AutoCad so that I could have actual hard angles. I have a buddy with a cnc mill so eventually I will probably get him to mill these plates but for now I will just make them in my own garage. I have a small manual mill shown below.
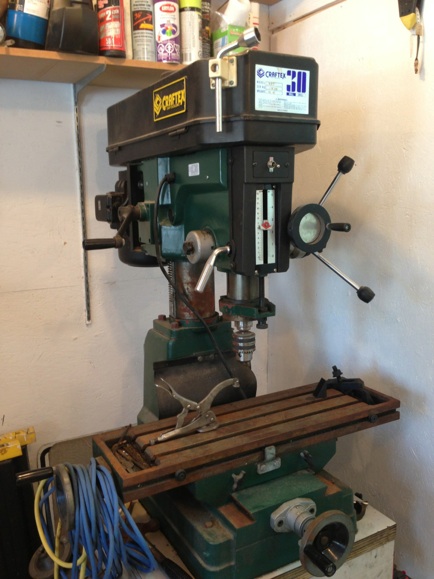
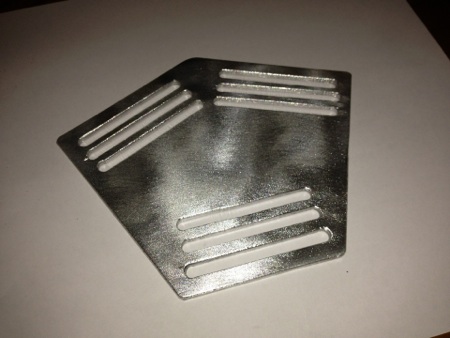
Step 2) - Machine the lower waist bracket to connect vertical spine webbing to the waist belt. I started out today to machine the brackets required for my DIY Razor. I am not an experienced machinist by any means but did my best and I am reasonably happy. I may get my buddy to cnc mill these once I am totally satisfied. For now they seem to work pretty well. This is a prototype so I can stand a little inaccuracy at this stage.

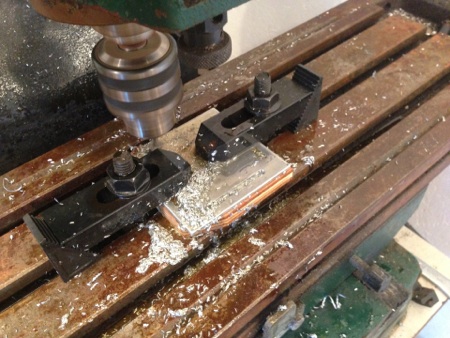
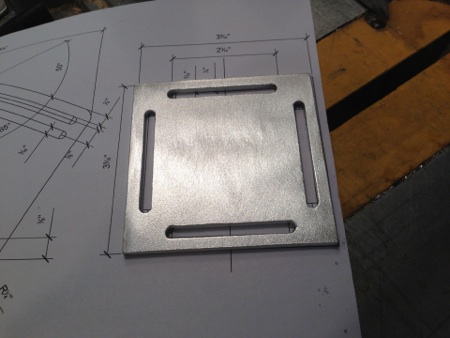
Step 3) - Machine the shoulder bracket to connect shoulder straps to the vertical spine webbing. This piece connects the shoulder straps to the web that runs straight down the spine. This plate will also connect the loop bungees I intend to use. This is similar to the setup I use on my Nomad JT that was configured by Ed Sorenson of Cave Adventurers. I changed my design to three parallel slots so that I did not need to use a triglide to secure the webbing which is nice. I also added a series of holes down the center which I bolted the Razor harness to on the top end. I also need to add four additional holes for the loop bungees which do not show in this photo either.
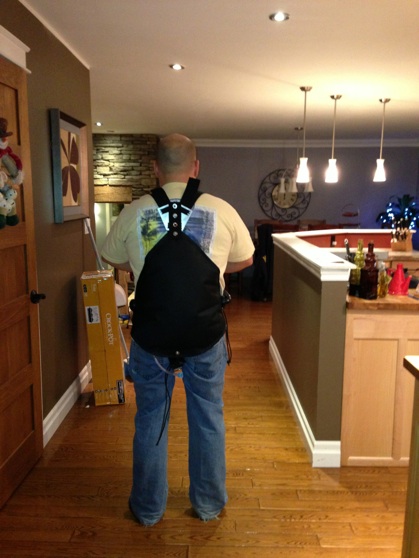
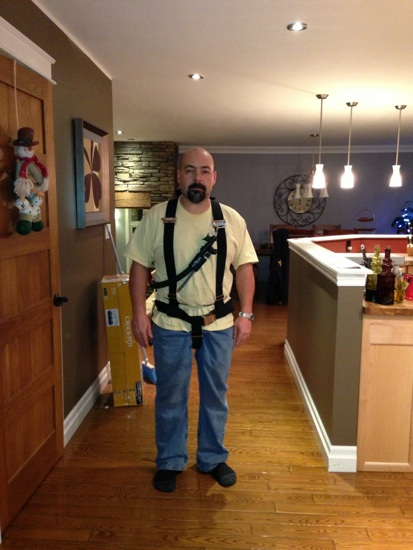
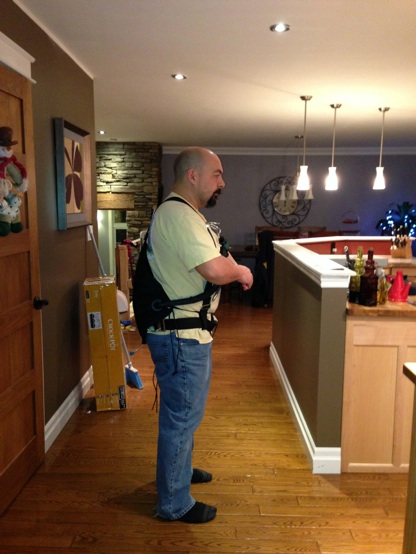
Step 4) - Route all the webbing and assemble the harness. I am mostly complete with the creation of the harness. Once the connecting plates are fabricated all that is left to do is weave the 2” webbing. If you notice in the front pics my shoulder straps go straight down to the wasit belt. I like this routing a lot better as it doesn’t feel like its rolling off my shoulders. It also works well in combination with the crotch strap. I need to add a chest strap which is a must in my opinion especially when using a fixed connection to the chest D ring which I always use.
I will add a more elaborate breakdown of the various lengths of webbing used and the specifc D rings I used. I want to try this harness in the pool and tweak it before I give out the “recipe”. I am heading to Cabo at the end of January to dive so I need to get this harness finalized before I go as I am divbing it in Cabo come Hell or high water... Stay tuned for some pool shots of this harness in action.